Blog

  • Unlock Effortless Markdown Creation: Discover the Power of AI-Assisted Workflows for Developers

    Unlock Effortless Markdown Creation: Discover the Power of AI-Assisted Workflows for Developers

    🖊️ How AI-Assisted Markdown Changed My Life as a Developer 💻

    As a developer, I’m always looking for ways to streamline my workflow and be more productive. Writing documentation, READMEs, and other markdown files has always been a bit of a chore for me. It’s time-consuming and often feels like it takes me out of my coding flow. But then I discovered the world of AI-assisted markdown creation, and it completely transformed how I approach writing as a developer.

    Close-up of hands molding clay on a pottery wheel, showcasing craftsmanship and artistic creation.
    Photo by Mikhail Nilov on Pexels

    🤖 My First Experience with AI-Powered Markdown

    I still remember the first time I tried an AI-assisted markdown tool. I was working on a GitHub README for one of my projects and dreading having to context switch from coding to writing mode. On a whim, I decided to give one of these AI writing assistants a shot. I was blown away by how intuitive and helpful it was.

    The AI suggested relevant section headers, helped me auto-generate code snippets and command examples, and even pointed out areas where my instructions could be clearer for users. It felt like I had an intelligent collaborator working alongside me, streamlining the writing process and helping me create higher-quality markdown documents in a fraction of the time.

    ✅ ⚡ Top Benefits of AI-Assisted Markdown for Developers

    After that first positive experience, I was hooked. I started using AI writing tools for all sorts of markdown tasks – documentation, wikis, blogs, you name it. Here are some of the biggest benefits I’ve found:

    🚀 Increased Productivity

    By far the biggest advantage is the productivity boost. What used to take me hours of effort I can now accomplish in minutes with AI assistance. It eliminates writer’s block and helps the words flow effortlessly. As a developer, anything that helps me stay in my coding flow and get more done is a huge win.

    🎨 Improved Quality and Consistency

    The AI writing tools I use have also helped me level-up the quality and consistency of my markdown. They offer intelligent suggestions, catch errors and typos, and help enforce style conventions. My docs now look polished and professional with minimal effort on my part.

    🧠 Intelligent Suggestions and Completions

    One of the coolest things about AI markdown assistants is how they learn your writing style and preferences over time. The auto-complete and suggestion features get smarter the more you use them. It’s like having a markdown autocomplete that’s tailored just for you.

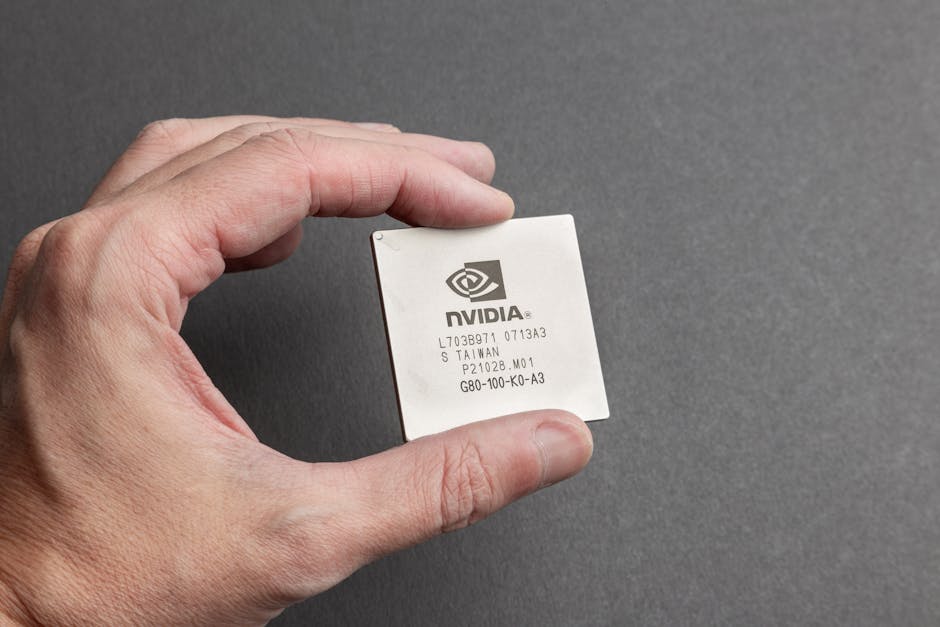
    A close-up view of a person holding an Nvidia chip with a gray background.
    Photo by Stas Knop on Pexels

    💡 💡 Tips for Integrating AI Into Your Markdown Workflow

    If you’re a developer considering using AI writing tools for markdown, here are a few tips to get the most out of the experience:

    🔍 Find the Right Tool for Your Needs

    There are a number of great AI markdown tools out there (both free and paid). Take some time to research and compare the options to find the one that best fits your needs and budget. Some cater more towards long-form writing while others are geared specifically for developers and technical docs.

    🎓 Take Advantage of Templates and Learning Resources

    Most tools offer pre-built templates and guides for common markdown scenarios (READMEs, wikis, changelogs, etc). Taking advantage of these can help you get up-and-running quickly. Many also provide learning resources to help you get the most out of the AI writing features.

    ✏️ Review and Edit the AI Suggestions

    While AI assistance can be a huge help, it’s not perfect. Be sure to review and edit the generated text to make sure it meets your needs and standards. The AI can get you 90% of the way there, but that human touch is still needed to cross the finish line.

    🙌 Embrace the AI Writing Assistant Lifestyle

    I can’t imagine going back to writing markdown the old fashioned way. AI-assisted markdown creation has become an essential part of my toolkit as a developer. It saves me time, improves the quality of my writing, and makes creating documentation almost enjoyable.

    If you haven’t yet tried AI writing tools for markdown, I highly encourage you to give them a shot. Find the right tool, take some time to learn the features and capabilities, and watch your productivity as a developer skyrocket. Trust me, once you start using AI to assist your markdown, you’ll wonder how you ever managed without it!

    Woman creating a vision board with images in a stylish home setting, showcasing creativity and focus.
    Photo by Mikhail Nilov on Pexels
  • Unlock the Power of Code in Markdown: A Step-by-Step Guide

    Unlock the Power of Code in Markdown: A Step-by-Step Guide

    📚 📝 Mastering Code Embedding in Markdown: A Comprehensive Guide 🚀

    As a passionate writer and developer, I’ve found that embedding code in markdown is an essential skill for creating informative and visually appealing technical content. Whether you’re writing documentation, tutorials, or blog posts, knowing how to properly embed code can make a world of difference in the clarity and readability of your work. In this comprehensive guide, I’ll share my personal experiences and insights to help you master the art of embedding code in markdown.

    🔍 Understanding the Basics of Code Embedding

    When I first started working with markdown, I quickly realized the importance of being able to embed code snippets effectively. Code embedding allows you to showcase examples, demonstrate syntax, and provide clear instructions to your readers. The key is to make the code stand out from the regular text while maintaining the overall flow and readability of your content.

    To embed code in markdown, you’ll typically use a combination of backticks (`) and specific formatting conventions. For inline code, simply wrap the code snippet in single backticks, like this: `print(“Hello, World!”)`. This is perfect for short code examples or references within a sentence.

    💻 Embedding Code Blocks for Longer Snippets

    For longer code snippets or entire code blocks, you’ll want to use triple backticks (“`) to create a fenced code block. Here’s an example:

    “`python
    def greet(name):
    print(f”Hello, {name}!”)

    greet(“John”)
    “`

    By placing triple backticks before and after your code block, you create a distinct section that visually separates the code from the surrounding text. This makes it easier for readers to identify and focus on the code itself.

    🎨 Syntax Highlighting for Enhanced Readability

    One of the most powerful features of code embedding in markdown is the ability to apply syntax highlighting. Syntax highlighting adds color and formatting to your code based on the programming language, making it much easier to read and understand.

    To enable syntax highlighting, simply specify the language immediately after the opening triple backticks. For example, to highlight Python code, you would use:

    “`python
    def calculate_sum(a, b):
    return a + b
    “`

    Most markdown renderers support a wide range of programming languages, so you can easily highlight code in languages like JavaScript, HTML, CSS, Ruby, and more. Just replace “python” with the appropriate language identifier.

    📊 Embedding Code from External Sources

    Sometimes, you may want to embed code snippets from external sources, such as GitHub repositories or online code playgrounds. Many markdown renderers allow you to directly embed code by providing a URL to the external source.

    For example, to embed a code snippet from a GitHub repository, you can use the following syntax:

    “`
    https://github.com/username/repository/blob/main/example.py
    “`

    This will fetch the code from the specified URL and display it within your markdown content. It’s a convenient way to include real-world examples or link to more comprehensive code samples.

    🎓 Best Practices for Code Embedding

    When embedding code in markdown, there are a few best practices to keep in mind:

    1. Choose meaningful and concise code snippets that illustrate your point effectively.
    2. Provide clear explanations or comments within the code to guide readers.
    3. Be consistent with your formatting and indentation to enhance readability.
    4. Test your embedded code to ensure it renders correctly across different markdown viewers.
    5. Consider the context and audience when deciding how much code to embed.

    Remember, the goal is to enhance your content and make it more valuable for your readers. Use code embedding judiciously and always prioritize clarity and understanding.

    A woman in black attire kneels in dramatic lighting with ornate door backdrop.
    Photo by Kalistro on Pexels

    🌟 Elevate Your Markdown Content with Seamless Code Embedding! 💫

    Embedding code in markdown is a powerful tool that can greatly enhance the quality and impact of your technical writing. By following the techniques and best practices outlined in this guide, you’ll be well on your way to creating engaging and informative content that resonates with your audience.

    As you continue to work with markdown and embed code, don’t be afraid to experiment and find what works best for you. With practice and persistence, you’ll develop your own style and workflow that allows you to seamlessly integrate code examples into your writing.

    So go ahead, start embedding code in your markdown content, and watch as your technical writing skills soar to new heights! 🚀✨

  • Unlock the Power of Markdown: Transform It into Executable Code

    Unlock the Power of Markdown: Transform It into Executable Code

    📝 From Markdown to Magic: Turning Simple Text into Executable Code 🪄

    As a developer, I’m always looking for ways to streamline my workflow and make my life easier. One of the most powerful tools I’ve discovered for doing just that is the ability to turn plain markdown text into executable code. It’s like having a magic wand that can transform simple notes into fully-functional programs! 🔮

    When I first started exploring this concept, I was blown away by the possibilities. Imagine being able to jot down some quick ideas in markdown format, and then with a few simple commands, watch those ideas spring to life as working code. It’s a game-changer for rapid prototyping, testing out concepts, and even for creating full-fledged applications.

    High-resolution image of colorful programming code highlighted on a computer screen.
    Photo by Nemuel Sereti on Pexels

    🧩 The Building Blocks: Markdown and Code Fences 🏗️

    At the heart of turning markdown into executable code are two key components: the markdown format itself, and code fences. Markdown is a lightweight markup language that allows you to write plain text and add simple formatting like headers, bold text, and lists. It’s incredibly easy to learn and use, making it a popular choice for documentation, note-taking, and even blogging.

    Code fences, on the other hand, are a way to embed code snippets within your markdown. By surrounding your code with triple backticks (“`), you can specify the programming language and include your code right in the middle of your markdown text. This is where the magic happens! 🎩

    ✨ A Simple Example: Python in Markdown 🐍

    Let’s say you’re writing a markdown document and you want to include a simple Python script. You could do something like this:

    “`python
    def greet(name):
    print(f”Hello, {name}! Welcome to the world of executable markdown!”)

    greet(“fellow code wizard”)
    “`

    By using the code fence and specifying the language as `python`, you’ve just embedded a fully-functional Python script right in your markdown. Pretty cool, right? 😎

    🚀 Bringing Your Markdown to Life: Execution Engines 🔥

    Now, here’s where things get really exciting. To actually execute the code within your markdown, you’ll need to use an execution engine. There are several options available, each with its own strengths and use cases.

    One popular choice is Jupyter Notebooks. With Jupyter, you can create interactive documents that combine markdown text, code, and even visualizations. It supports a wide range of programming languages and provides a seamless environment for executing your code and seeing the results in real-time.

    Another powerful tool is Codeanywhere. It allows you to write markdown with embedded code snippets and execute them directly within the platform. It’s like having a virtual development environment right at your fingertips, accessible from anywhere! ☁️

    💡 Endless Possibilities: From Prototyping to Presentations 🌟

    The applications for executable markdown are virtually endless. Whether you’re prototyping a new feature, teaching a programming concept, or creating interactive documentation, the ability to blend markdown and code opens up a world of possibilities.

    Imagine being able to write a tutorial that not only explains a concept but also includes live code examples that readers can run and modify themselves. Or, picture yourself giving a presentation where you can showcase your ideas and demonstrate working code snippets in real-time, all within a sleek markdown-based slide deck. 🎨

    Abstract green matrix code background with binary style.
    Photo by Markus Spiske on Pexels

    🌈 Embracing the Power of Executable Markdown 🦄

    As you can see, the ability to turn markdown into executable code is an incredibly powerful tool to have in your developer toolkit. It streamlines your workflow, enables rapid experimentation, and makes it easier than ever to bring your ideas to life.

    So why not give it a try? Start by exploring the different execution engines available, and dive into the world of markdown-based coding. Trust me, once you experience the magic of executable markdown, you’ll wonder how you ever lived without it! 🙌

    Whether you’re a seasoned developer or just starting out, embracing the power of executable markdown will take your productivity and creativity to new heights. So go ahead, write some markdown, sprinkle in some code, and watch your ideas come to life before your very eyes! 🎉

    Happy coding, my fellow markdown wizards! 🧙‍♂️✨

  • Unlock the Power of Markdown: Streamlining Version Control for Seamless Collaboration

    Unlock the Power of Markdown: Streamlining Version Control for Seamless Collaboration

    How Markdown and Version Control Changed My Life as a Writer 📝💾

    As a writer, I’m always looking for tools and techniques to streamline my workflow and make my life easier. Over the years, I’ve discovered two game-changers that have revolutionized the way I write and collaborate with others: markdown and version control. In this post, I’ll share my personal experiences with these tools and how they’ve transformed my writing process.

    A blue button with 'YES!' text on a black background for communication and decision-making concepts.
    Photo by Ann H on Pexels

    Falling in Love with Markdown 😍

    When I first started writing, I was using traditional word processors like Microsoft Word. While these tools got the job done, I often found myself getting distracted by formatting options and spending too much time fiddling with styles instead of focusing on my content. That’s when I discovered markdown.

    What is Markdown?

    Markdown is a lightweight markup language that allows you to write plain text and convert it to HTML. It uses simple, intuitive syntax to format your text, such as:

    – Asterisks (*) for italics
    – Double asterisks (**) for bold
    – Hyphens (-) for unordered lists
    – Numbers (1., 2., etc.) for ordered lists
    – Hashtags (#) for headings

    Why I Love Markdown

    There are several reasons why I’ve fallen head over heels for markdown:

    1. It’s simple and distraction-free. With markdown, I can focus on my writing without getting bogged down by formatting options.

    2. It’s portable. Markdown files are just plain text, so I can open and edit them in any text editor on any device.

    3. It’s easy to convert. When I’m ready to publish, I can easily convert my markdown to HTML or other formats using tools like Pandoc.

    Embracing Version Control with Git 🌳

    As I started writing more and collaborating with others, I quickly realized the importance of version control. That’s when I discovered Git, a powerful version control system that has become an essential part of my workflow.

    What is Version Control?

    Version control is a system that tracks changes to files over time. It allows you to:

    – See who made changes and when
    – Revert to previous versions if needed
    – Work on the same files simultaneously with others
    – Merge changes from different people

    How Git Has Transformed My Writing Process

    Using Git for version control has been a total game-changer for me as a writer. Here’s why:

    1. It provides a safety net. With Git, I never have to worry about losing my work or overwriting someone else’s changes. I can always revert to a previous version if needed.

    2. It enables seamless collaboration. Git makes it easy to work on the same files with other writers and merge our changes together. No more emailing documents back and forth!

    3. It gives me peace of mind. Knowing that all my changes are tracked and backed up in Git repositories helps me write with confidence.

    Photo by MAG Photography on Pexels

    Putting It All Together 🧩

    By combining the simplicity of markdown with the power of Git version control, I’ve created a writing workflow that is streamlined, efficient, and stress-free. I write my drafts in markdown, use Git to track my changes and collaborate with others, and then convert to HTML for publishing. It’s a beautiful system that has truly changed my life as a writer.

    Give Markdown and Git a Try 🚀

    If you’re a writer looking to simplify your process and collaborate more effectively, I highly recommend giving markdown and Git a try. While there may be a bit of a learning curve at first, the long-term benefits are well worth the effort. Trust me, your future self will thank you!

    Happy writing! ✍️😊

    A close-up of a TV remote on a wooden table with soft sunlight streaming in.
    Photo by Alexey Demidov on Pexels
  • Unlock Your Productivity: Mastering Markdown for Effortless Note-Taking and Knowledge Management

    Unlock Your Productivity: Mastering Markdown for Effortless Note-Taking and Knowledge Management

    How I Transformed My Note-Taking and Knowledge Management with Markdown 📝💡

    As a lifelong learner and avid note-taker, I’ve tried countless methods and tools to capture, organize, and retrieve information effectively. From scribbled notebooks to complex apps, I’ve experimented with them all. But it wasn’t until I discovered markdown that I found a system that truly revolutionized my note-taking and knowledge management process. In this post, I’ll share my journey with markdown and how it has become an indispensable tool in my productivity arsenal.

    Two colleagues engaging in a collaborative work session, reviewing documents at a desk.
    Photo by MART PRODUCTION on Pexels

    What is Markdown? 🤔

    Before diving into how markdown transformed my note-taking, let’s quickly cover what it is. Markdown is a lightweight markup language that allows you to format plain text using a simple, intuitive syntax. With markdown, you can create headers, lists, links, images, and more, all without taking your hands off the keyboard or getting distracted by complicated formatting options.

    Why Markdown is Perfect for Note-Taking 🌟

    Simplicity and Speed ⚡

    One of the biggest advantages of using markdown for note-taking is its simplicity. The syntax is so straightforward that you can learn it in minutes. This means you can focus on capturing your thoughts and ideas quickly, without getting bogged down in formatting. I found that using markdown allowed me to take notes faster and more efficiently than ever before.

    Flexibility and Portability 🌍

    Another great thing about markdown is its flexibility and portability. Since markdown files are plain text, they can be opened and edited on virtually any device or platform. This makes it easy to access your notes from anywhere, whether you’re at your desk, on your phone, or using a public computer. I love knowing that my notes are always available to me, no matter where I am.

    Distraction-Free Writing 🧘‍♀️

    Markdown also enables a distraction-free writing experience. With most note-taking apps, you’re constantly bombarded with buttons, menus, and options that can pull your focus away from your content. With markdown, you can write in a clean, clutter-free environment that allows you to concentrate on your thoughts and ideas. I’ve found that this has greatly improved my ability to think clearly and creatively when taking notes.

    A young boy in a yellow shirt sits at a table taking notes indoors, focused and engaged.
    Photo by Antoni Shkraba Studio on Pexels

    How I Use Markdown for Knowledge Management 🧠

    Organizing Notes with Tags and Links 🏷️

    In addition to taking notes, I also use markdown to organize and manage my knowledge. One way I do this is by using tags and links. With markdown, it’s easy to add tags to your notes, making them searchable and easy to categorize. You can also create links between related notes, building a web of interconnected ideas and information. I’ve found this to be a powerful way to explore and develop my knowledge on various topics.

    Creating a Personal Knowledge Base 📚

    Over time, my collection of markdown notes has grown into a comprehensive personal knowledge base. Whenever I come across an interesting article, idea, or piece of information, I capture it in a markdown note. I then tag it and link it to related notes, creating a rich tapestry of knowledge that I can draw upon whenever I need it. This has been invaluable for both personal and professional projects, allowing me to quickly access and apply relevant information.

    Collaborating with Others 👥

    Markdown is also great for collaborating with others. Since markdown files are plain text, they can easily be shared, edited, and version-controlled using tools like Git. This makes it simple to work on notes and documents with colleagues, friends, or family members. I’ve used markdown to collaborate on everything from meeting notes to creative writing projects, and it has always been a smooth and efficient process.

    💡 Tools and Tips for Markdown Note-Taking 🛠️

    Choosing the Right Editor ✍️

    To get the most out of markdown, it’s important to choose the right editor. There are many great options available, both free and paid. Some popular choices include Typora, iA Writer, and Visual Studio Code with the markdown extension. I personally use Obsidian, which is a powerful, cross-platform markdown editor with a variety of useful features like backlinks, graph view, and plugins.

    Mastering the Syntax 🎓

    While markdown syntax is simple, there are a few tricks and best practices that can make your notes even more effective. For example, using consistent header levels and naming conventions can help keep your notes organized and easy to navigate. Learning how to create tables, code blocks, and other advanced elements can also be useful for certain types of notes. I recommend spending some time exploring the full range of markdown syntax and finding what works best for your needs.

    Integrating with Other Tools 🔄

    Finally, don’t be afraid to integrate markdown with other tools and platforms. Many popular apps and services, like Evernote, Trello, and GitHub, support markdown formatting. This means you can use markdown to take notes, create documents, and collaborate across a wide range of contexts. I often use markdown to draft blog posts, create project documentation, and even write emails, making it a versatile tool in my productivity toolkit.

    A woman in a white shirt writes on a flipchart during a business presentation.
    Photo by Thirdman on Pexels

    🎯 Conclusion: Embracing the Power of Markdown 🚀

    Markdown has truly transformed the way I take notes and manage my knowledge. Its simplicity, flexibility, and versatility make it an indispensable tool for anyone looking to capture, organize, and share information effectively. Whether you’re a student, professional, or lifelong learner, I highly recommend giving markdown a try. With a little practice and experimentation, you may just find that it revolutionizes your note-taking and knowledge management process, as it did for me.

    So why not start your markdown journey today? Choose an editor, start exploring the syntax, and see where your notes take you. You may be surprised at how much more productive, creative, and organized you become when you embrace the power of markdown. 📝✨

  • Effortlessly Convert Code Snippets to Markdown: A Step-by-Step Guide

    Effortlessly Convert Code Snippets to Markdown: A Step-by-Step Guide

    📚 📝 Converting Code Snippets to Markdown Format: A Developer’s Guide 🚀

    As a developer, I spend a lot of time working with code snippets. Whether I’m writing documentation, creating tutorials, or sharing code examples on my blog, being able to present code in a clean and readable format is crucial. That’s where Markdown comes in handy! 🙌 In this post, I’ll share my experiences and insights on converting code snippets to Markdown format and provide you with actionable tips to make the process a breeze. Let’s dive in! 🏊‍♂️

    🤔 Why Markdown for Code Snippets?

    Before we get into the nitty-gritty of converting code snippets to Markdown, let’s talk about why Markdown is such a great choice for presenting code. Here are a few key reasons:

    1. 📖 Readability: Markdown allows you to format your code snippets in a way that’s easy on the eyes. With proper syntax highlighting and formatting, your code will be much more readable and understandable for your audience.

    2. 🌐 Portability: Markdown is a widely supported format that can be easily converted to HTML, PDF, or other formats. This means your code snippets can be seamlessly integrated into various platforms and documents.

    3. 🎨 Customization: Markdown provides flexibility in styling your code snippets. You can choose from different syntax highlighting themes and customize the appearance to match your blog or documentation style.

    🛠️ Tools for Converting Code to Markdown

    Now that we know why Markdown is awesome for code snippets, let’s explore some tools that can help us convert our code to Markdown format:

    1. 🌟 VS Code: If you’re using Visual Studio Code as your code editor, you’re in luck! VS Code has built-in Markdown preview and formatting features. Simply wrap your code in triple backticks (“`), and VS Code will automatically format it as a code block.

    2. 🌿 Online Converters: There are several online tools that can convert your code to Markdown format. One of my favorites is [CodeBeautify](https://codebeautify.org/code-to-markdown). Just paste your code, select the programming language, and voila! You have your Markdown-formatted code ready to go.

    3. 🐍 Language-Specific Tools: Some programming languages have their own tools for converting code to Markdown. For example, Python has the `pygments` library, which can generate Markdown-formatted code with syntax highlighting. Check if your language has similar tools available.

    💡 Tips for Writing Markdown Code Snippets

    Here are some tips I’ve learned along the way to make your Markdown code snippets shine:

    1. 🏷️ Use Proper Language Tags: When wrapping your code in triple backticks, make sure to specify the programming language after the opening backticks. This ensures proper syntax highlighting and makes your code more readable.

    “`python
    def greet(name):
    print(f”Hello, {name}!”)
    “`

    2. 📏 Keep Lines Short: Long lines of code can be difficult to read, especially on mobile devices. Try to keep your lines of code under 80 characters whenever possible. Use appropriate line breaks and indentation to improve readability.

    3. 🗒️ Add Explanatory Comments: If your code snippet is complex or requires additional context, consider adding comments within the code itself. This helps readers understand the purpose and functionality of your code.

    “`javascript
    // Function to calculate the sum of an array
    function arraySum(arr) {
    return arr.reduce((sum, num) => sum + num, 0);
    }
    “`

    4. 🎨 Choose a Consistent Style: Stick to a consistent formatting style for your code snippets. This includes indentation, spacing, and naming conventions. Consistency makes your code more professional and easier to follow.

    🌟 Conclusion: Elevate Your Code Snippets with Markdown! 🚀

    Converting your code snippets to Markdown format is a game-changer for enhancing the readability and presentation of your code. By leveraging tools like VS Code, online converters, and language-specific libraries, you can easily transform your code into beautifully formatted Markdown snippets. 🎉

    Remember to use proper language tags, keep lines short, add explanatory comments, and maintain a consistent style throughout your code snippets. These tips will ensure that your code is not only functionally sound but also visually appealing and easy to understand for your readers. 😊

    So, go ahead and start converting your code to Markdown format today! Your audience will thank you for the improved readability and clarity. Happy coding! 💻✨

    Close-up of colorful coding text on a dark computer screen, representing software development.
    Photo by Markus Spiske on Pexels
  • Transform Your Code: Convert Snippets to Markdown for Effortless Sharing

    Transform Your Code: Convert Snippets to Markdown for Effortless Sharing

    📝 How I Learned to Easily Convert Code Snippets to Markdown 💻

    As a developer, I’m always looking for ways to streamline my workflow and make my life easier. One task that used to be a real pain point for me was converting code snippets into nicely formatted Markdown. I would spend way too much time manually adding backticks, indents, and language identifiers. But then I discovered some fantastic tools and tricks that have completely transformed how I handle code in my Markdown documents.

    In this post, I want to share my journey and the valuable lessons I’ve learned about converting code to Markdown. If you’ve ever struggled with this yourself, I think you’ll find some really helpful tips here that you can put into practice right away.

    🤯 Why Formatting Code in Markdown Matters

    Before we dive into the “how”, let’s talk about the “why”. You might be wondering if going to the trouble of nicely formatting your code snippets in Markdown is really worth it. I can tell you from experience that it absolutely is! Here’s why:

    • It makes your code much more readable and scannable, especially for others
    • It allows you to easily specify the programming language for syntax highlighting
    • It keeps your Markdown document clean and uncluttered
    • Many Markdown editors and viewers support well-formatted code blocks

    When I first started using Markdown, I didn’t put much effort into my code formatting. My documents worked, but they didn’t look great and weren’t very user-friendly for others trying to read my code. Once I realized how much of a difference proper formatting made, I became determined to find a better way.

    🛠️ Tools for Converting Code to Markdown

    Fortunately, I discovered that there are some excellent tools out there that make converting code to Markdown a breeze. Here are a few of my favorites:

    Backticks for inline code

    For short code snippets that appear inline with other text, simply wrap them in backticks (`). For example: `const x = 10;`. Most Markdown parsers will recognize this and format it as code.

    Code fencing for code blocks

    For multi-line code blocks, use a technique called “code fencing”. This involves wrapping your code in triple backticks (“`) before and after the code block. You can also specify the language for syntax highlighting after the opening backticks.

    Here’s an example:

    “`javascript
    function greet(name) {
    console.log(`Hello, ${name}!`);
    }
    “`

    Online tools

    There are also some handy web-based tools that allow you to paste in your code and convert it to Markdown instantly. One that I use all the time is Tables Generator. Just select the “Markdown” tab, paste your code, select the language, and hit Generate. It spits out perfectly formatted Markdown that you can copy and paste into your document.

    Another great one is StackEdit. This is a full-featured Markdown editor that has built-in support for converting code snippets. Just paste your code into a code block and it will automatically format it and detect the language.

    Markdown shortcuts in editors

    If you use a code editor like VS Code, there’s a good chance it has built-in Markdown shortcuts that can help with code formatting. For example, in VS Code you can type “ “` “ and hit Enter to automatically create a code fence. Then just paste your code inside and specify the language.

    Many other editors like Atom, Sublime Text, and MacDown have similar shortcuts and features for working with Markdown and code. It’s worth taking a few minutes to explore what your editor offers.

    💡 Tips for Better Code Snippets in Markdown

    In addition to using the right tools, I’ve learned a few best practices that have helped me create cleaner, more useful code snippets in my Markdown docs:

    • Always specify a language when possible to enable syntax highlighting
    • Use short but descriptive file names in your code fences, like `example.js`
    • Provide comments or explanations before or after a code block if needed
    • Be consistent with your formatting (e.g. always use code fences for multi-line code)
    • Test your Markdown output to make sure the code appears as expected

    Following these simple tips has made a huge difference in the quality and clarity of the code snippets in my Markdown documents. I feel more confident sharing them knowing that they’ll be easy for others to read and understand.

    Close-up of colorful coding text on a dark computer screen, representing software development.
    Photo by Markus Spiske on Pexels

    👩‍💻 Putting It All Into Practice

    I hope this post has given you some valuable insights and tools for converting code snippets to Markdown. I know it can seem daunting at first, but once you get the hang of it, it becomes second nature.

    My advice is to start small. The next time you need to include a code snippet in a Markdown document, take an extra minute to format it properly using code fences and a language identifier. Test how it looks in your Markdown editor or viewer. Over time, keep practicing and exploring the tools and shortcuts available to you.

    Pretty soon, you’ll be a pro at formatting clean, readable code snippets that really enhance your Markdown documents. Your readers (and your future self) will thank you!

    So what are you waiting for? Get out there and start putting these tips into practice today. Trust me, it’s worth the effort. 💪

    Happy coding and Markdown writing!

  • Unlock the Power of Markdown: A Step-by-Step Guide to Creating Captivating READMEs

    Unlock the Power of Markdown: A Step-by-Step Guide to Creating Captivating READMEs

    📝 Mastering the Art of Markdown: How to Create a Killer README File 🚀

    When I first started coding, I had no idea what a README file was or why it mattered. As I dove deeper into the world of programming, I quickly realized that a well-crafted README is essential for any project. It’s the first thing people see when they stumble upon your code, and it can make or break their decision to explore further.

    In this post, I’ll share my journey of learning how to create an awesome README file using Markdown. Trust me, once you get the hang of it, you’ll wonder how you ever lived without it! 😄

    Black and white image showcasing the intricate process of crafting a ring by hand.
    Photo by Tima Miroshnichenko on Pexels

    🤔 What is a README File and Why Should You Care?

    A README file is like a welcome mat for your code repository. It’s a plain text file that introduces your project, explains what it does, and provides instructions on how to use it. Think of it as a user manual for your code.

    But why is it so important? Here are a few reasons:

    🙋‍♀️ It Helps People Understand Your Project

    When someone lands on your repository, they want to know what your project is all about. A clear and concise README file can quickly convey the purpose, features, and benefits of your code. It’s your chance to make a great first impression and entice people to dive deeper.

    🤝 It Facilitates Collaboration

    If you’re working on a team or open-sourcing your project, a well-documented README is crucial. It helps other developers understand how to contribute, what the project structure looks like, and any guidelines they should follow. A good README can save you a lot of time answering repetitive questions and ensure everyone is on the same page.

    🌟 It Showcases Your Skills

    A polished README file not only reflects the quality of your code but also demonstrates your communication skills. It shows that you care about the user experience and are willing to go the extra mile to make your project accessible and understandable. In a sea of code repositories, a standout README can help you shine! ✨

    ✍️ Mastering Markdown: The Secret Sauce of README Files

    Now that you know why README files are important, let’s dive into how to create one using Markdown. Markdown is a lightweight markup language that allows you to format text using a simple and intuitive syntax. It’s the go-to choice for writing README files because it’s easy to learn and produces clean, readable files.

    Here are some essential Markdown elements you should know:

    # Headers

    Headers help structure your README and make it easier to navigate. In Markdown, you create headers using the ‘#’ symbol followed by a space. The number of ‘#’ symbols determines the header level. For example:

    “`
    # Main Header (H1)
    ## Subheader (H2)
    ### Sub-subheader (H3)
    “`

    – Lists

    Lists are great for organizing information and making your README more scannable. You can create unordered lists using ‘-‘, ‘*’, or ‘+’, and ordered lists using numbers followed by a period. For example:

    “`
    – Item 1
    – Item 2
    – Item 3

    1. First item
    2. Second item
    3. Third item
    “`

    **Bold** and *Italic* Text

    To emphasize important points or keywords, you can use bold and italic formatting. Surround the text with double asterisks for bold and single asterisks for italic. For example:

    “`
    **This text is bold**
    *This text is italic*
    “`

    [Links](url)

    Including links to relevant resources, documentation, or related projects can greatly enhance your README. To create a link, enclose the link text in square brackets and the URL in parentheses. For example:

    “`
    [Click here to visit my website](https://www.mywebsite.com)
    “`

    ![Alt Text](image-url)

    A picture is worth a thousand words, and including images in your README can help illustrate your points and make it more visually appealing. To add an image, use an exclamation mark followed by alt text in square brackets and the image URL in parentheses. For example:

    “`
    ![My Project Screenshot](https://www.example.com/screenshot.png)
    “`

    A monochrome image showcasing various tools used in jewelry making, emphasizing craftsmanship.
    Photo by Tima Miroshnichenko on Pexels

    🎨 Putting It All Together: Crafting Your README Masterpiece

    Now that you have the building blocks of Markdown, it’s time to put them together to create your README file. Here’s a simple template to get you started:

    “`
    # Project Title

    A brief description of what your project does.

    ## Features

    – Feature 1
    – Feature 2
    – Feature 3

    ## Installation

    Step-by-step instructions on how to install and set up your project.

    ## Usage

    Examples and explanations of how to use your project.

    ## Contributing

    Guidelines for contributing to your project, if applicable.

    ## License

    Information about the license under which your project is distributed.

    ## Contact

    How to reach you for questions, feedback, or support.
    “`

    Remember, this is just a starting point. Feel free to customize and expand upon this template to fit your project’s unique needs. The key is to be clear, concise, and provide value to your readers.

    🎯 🎉 Conclusion: Go Forth and README!

    Congratulations, you now have the knowledge and tools to create an amazing README file using Markdown! 🙌 Remember, a great README is an investment in your project’s success. It can attract contributors, improve user experience, and showcase your skills as a developer.

    So go forth and README! Experiment with different formats, add your personal touch, and most importantly, have fun with it. Your code deserves a brilliant introduction, and with Markdown, you have the power to make it happen.

    Happy coding, and may your READMEs be as awesome as your projects! 😄

    Monochrome image featuring various workshop tools arranged neatly on a surface.
    Photo by Tima Miroshnichenko on Pexels
  • Unlock the Power of Markdown: Mastering Best Practices for Effortless Content Creation

    Unlock the Power of Markdown: Mastering Best Practices for Effortless Content Creation

    💡 📝 Mastering Markdown: My Top Tips for Effective Documentation 💡

    As a writer and content creator, I’ve found markdown to be an invaluable tool for efficiently formatting my documents and notes. Over the years, I’ve learned some key best practices that have greatly improved the readability and organization of my markdown files. In this post, I want to share my top tips and insights to help you level up your markdown game.

    ✅ Keep It Simple and Consistent

    One of the biggest advantages of markdown is its simplicity. You don’t need complex formatting or fancy styling to create well-structured documents. I’ve found that keeping my markdown clean and minimal makes it much easier to read and maintain.

    Establish a consistent style for your headings, lists, and other elements. For example, I always use hyphens for unordered lists and numbers for ordered lists. For headings, I stick with double hash marks (##) for main sections and triple hashes (###) for subsections. Pick a style that works for you and use it consistently throughout your documents.

    🔗 Leverage Links and References

    Markdown makes it super easy to include links to other resources, which is great for providing additional context or citing sources. Whenever I mention a tool, article, or other relevant content, I always try to include a link so readers can dive deeper if they want to learn more.

    I’m also a big fan of using reference-style links. Instead of cluttering up my content with long URLs, I place my links at the bottom of the document and refer to them with short reference IDs. This keeps the main content readable while still providing easy access to related resources.

    🖼️ Use Images Judiciously

    Images can be a powerful way to enhance your content and provide visual examples. However, I’ve learned that it’s best to use them sparingly. Too many images can make a document feel cluttered and distract from the main content.

    When I do include images, I always add descriptive alt text. This improves accessibility for visually impaired readers and helps clarify the purpose of each image. I also prefer to use relative paths for my image files, so I can easily move my markdown documents between different projects and systems.

    📋 Embrace Code Blocks for Technical Content

    As a technical writer, I frequently need to include code snippets and command line examples in my documents. Markdown’s code block syntax is a lifesaver for this type of content. It allows me to cleanly format my code and distinguish it from the surrounding text.

    I always make sure to include the language identifier after my opening code fence. This enables syntax highlighting in many markdown editors and makes the code much easier to read. For inline code references, I use single backticks to set them apart from the regular text.

    ✏️ Don’t Neglect the Power of Plain Text

    While markdown provides a lot of helpful formatting options, I’ve found that plain text can be just as powerful. Sometimes the clearest way to make a point is with a concise, well-written paragraph.

    I try not to go overboard with fancy formatting when plain text will do the job. Keeping my writing clear and direct is more important than dressing it up with excessive stylistic elements. Well-structured plain text, combined with judicious use of headings and lists, can make for highly effective markdown documents.

    Black Friday sale sign on a letter board with a red background, concept for holiday shopping.
    Photo by Max Fischer on Pexels

    🎯 📑 Conclusion: Effective Markdown is a Skill Worth Mastering

    Learning to use markdown effectively has been a game changer for my writing and documentation. By keeping my formatting consistent and minimal, leveraging links and references, using images judiciously, embracing code blocks for technical content, and remembering the power of plain text, I’ve been able to create markdown documents that are a joy to write and read.

    I hope these tips have given you some ideas for enhancing your own markdown practices. Remember, the best way to improve is through regular use and iteration. Over time, you’ll develop your own style and workflows that work perfectly for your needs. Happy writing! ✍️